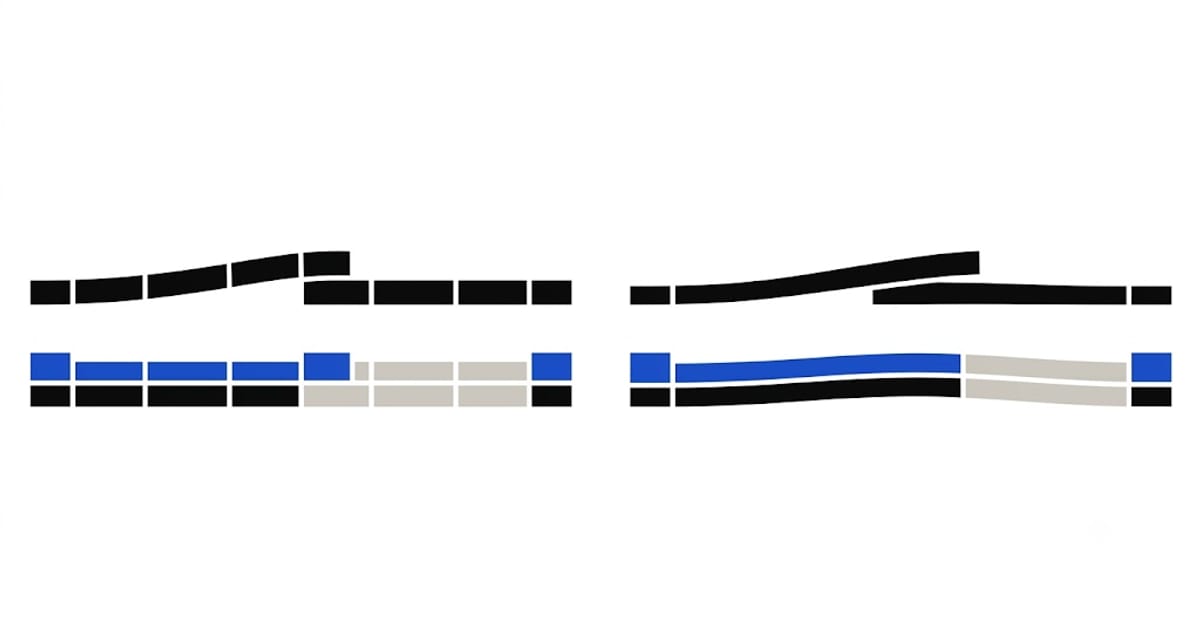
Lippage is a height difference between adjacent tiles at the joint. On large-format tile it is the defining quality problem, and most of it is designed in before any mortar is mixed.
Large tiles are slightly curved
Modern porcelain planks are pressed and fired, and firing produces a slight lengthwise crown — the middle sits a little higher than the ends. Manufacturers allow it within ASTM C485, and it is normal.
That curvature is the reason offset layouts fail on long tiles.
Why 50% offset is wrong for planks
In a 50% offset (running bond), the end of one tile lands at the middle of its neighbour — the highest point of the crown against the lowest point of the adjacent tile.
On a 6-inch tile the crown is negligible. On a 48-inch plank it is not, and the result is a lip you can feel with a bare foot at every joint.
Manufacturers now specify 33% offset or less for tiles over 15 inches on the longest side. Many warranties are void at 50%. Check the box before deciding on a pattern, because it decides how the room looks.
A one-third offset moves the neighbouring joint away from the peak of the crown, and the height difference at each joint drops to a fraction.
The substrate has to be flatter than you think
ANSI A108.02 for tile with any side over 15 inches:
1/8 inch in 10 feet, and 1/16 inch in 2 feet.
That is much flatter than a typical plywood subfloor or a poured slab. Meeting it usually means self-levelling compound, and that work has to happen before any tile is opened.
Checking it is straightforward: a 10 ft straightedge and a set of feeler gauges, or a long level and a torch behind it.
Levelling clip systems
Clips pull adjacent tiles into the same plane while the mortar cures. They work, and they are close to essential above about 18 inches.
What they cannot do is fix a substrate. A clip forces two tiles level at their shared edge by tilting them — over an uneven floor that transfers the problem to the next joint, and you end up with a floor that is level at every joint and visibly wavy across the room.
Level the substrate, then use clips for the residual.
Back-buttering
Required above about 15 inches, and it is what fills the void under the crown. Without it, the centre of each tile is unsupported and cracks the first time something heavy lands there.
Combine full notched coverage on the floor with a skim on the tile back, and aim for the ANSI 80% contact minimum — 95% in wet areas.
Check as you go
Pull one tile every so often and look at the back. Ridges that have not collapsed into continuous coverage mean the notch is too small or the mortar has skinned over, and both are correctable in the next ten minutes and not afterwards.